


 205 / 1302

3. Carcase Assembly Instructions.
1, Component labelling meanings.
DSL
: Drawer side left.
DSR: Drawer side right.
DE: Drawer end front & back.
DB, Drawer bottom.
SL, Side left.
SR, Side right.
BT, Bottom.
TP, Top.
SHF, Shelf.
TR, Top Rail.
BK, Back.
KB, Kick box.
DR, Door.
DF, Drawer front.
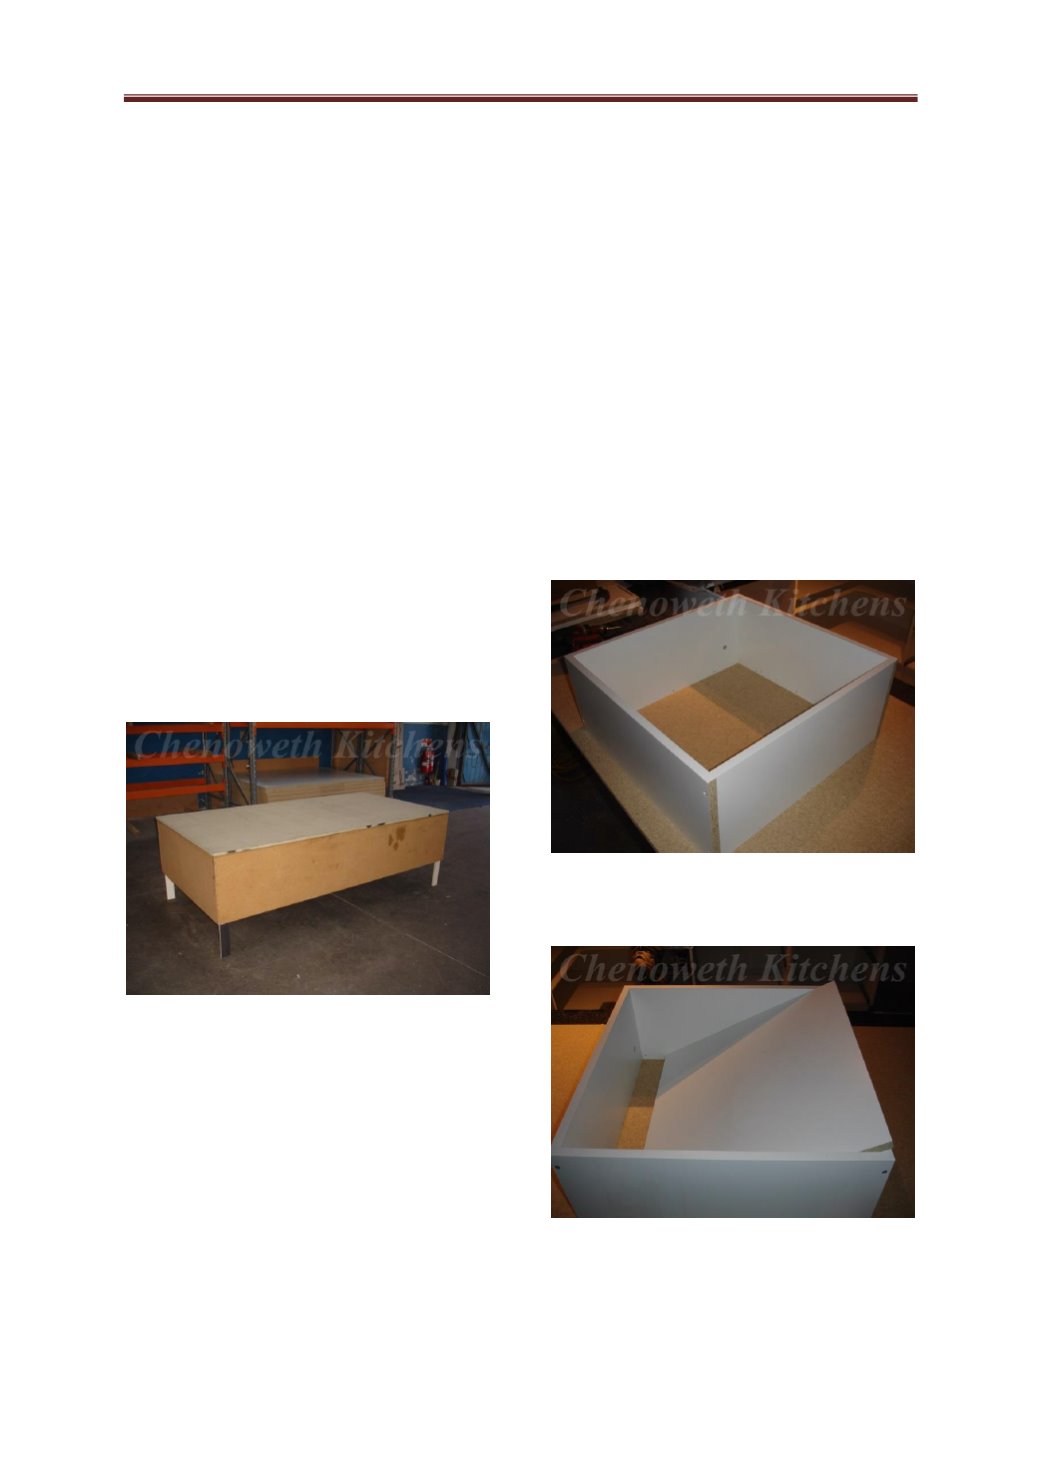
2, Standard carcase assembly.
Assemble all the individual components
together and fix together using the 50mm
screws provided.
Tip, You can use the large delivery box as
work bench , you may wish to elevate it by
fixing four legs to it .
3, Sink & Hot plate carcase assembly.
Assemble all the individual components
together and fix together using the 50mm
screws provided.
Tip, you can use a drop of construction glue
on the 42 x 18 rail ends.
4, Assembly of corner cabinets & walk
in pantries.
1
st
fix side & back together. 2
nd
fix top &
bottom together. 3
rd
fix middle shelf, ”pantry
only”. 4
th
fix other back together. 5
th
install
adjustable shelf, “bottom shelf to pantry
only”. 6
th
fix other side together.
Caution, do not forget to install the adjustable
shelf during assembly as you will not be able
to install it afterwards.
Tip, Assemble corner pantry close to final
position to minimise heavy lifting.
5, Drawer box assembly.
Assemble the sides, front & back together
using the 50mm screws provided.
Then insert the drawer bottom in & fix into
place ensuring that the screws to the side are
flush so as not to protrude. If they do
protrude they may cause the drawer to stick.