


 207 / 1302

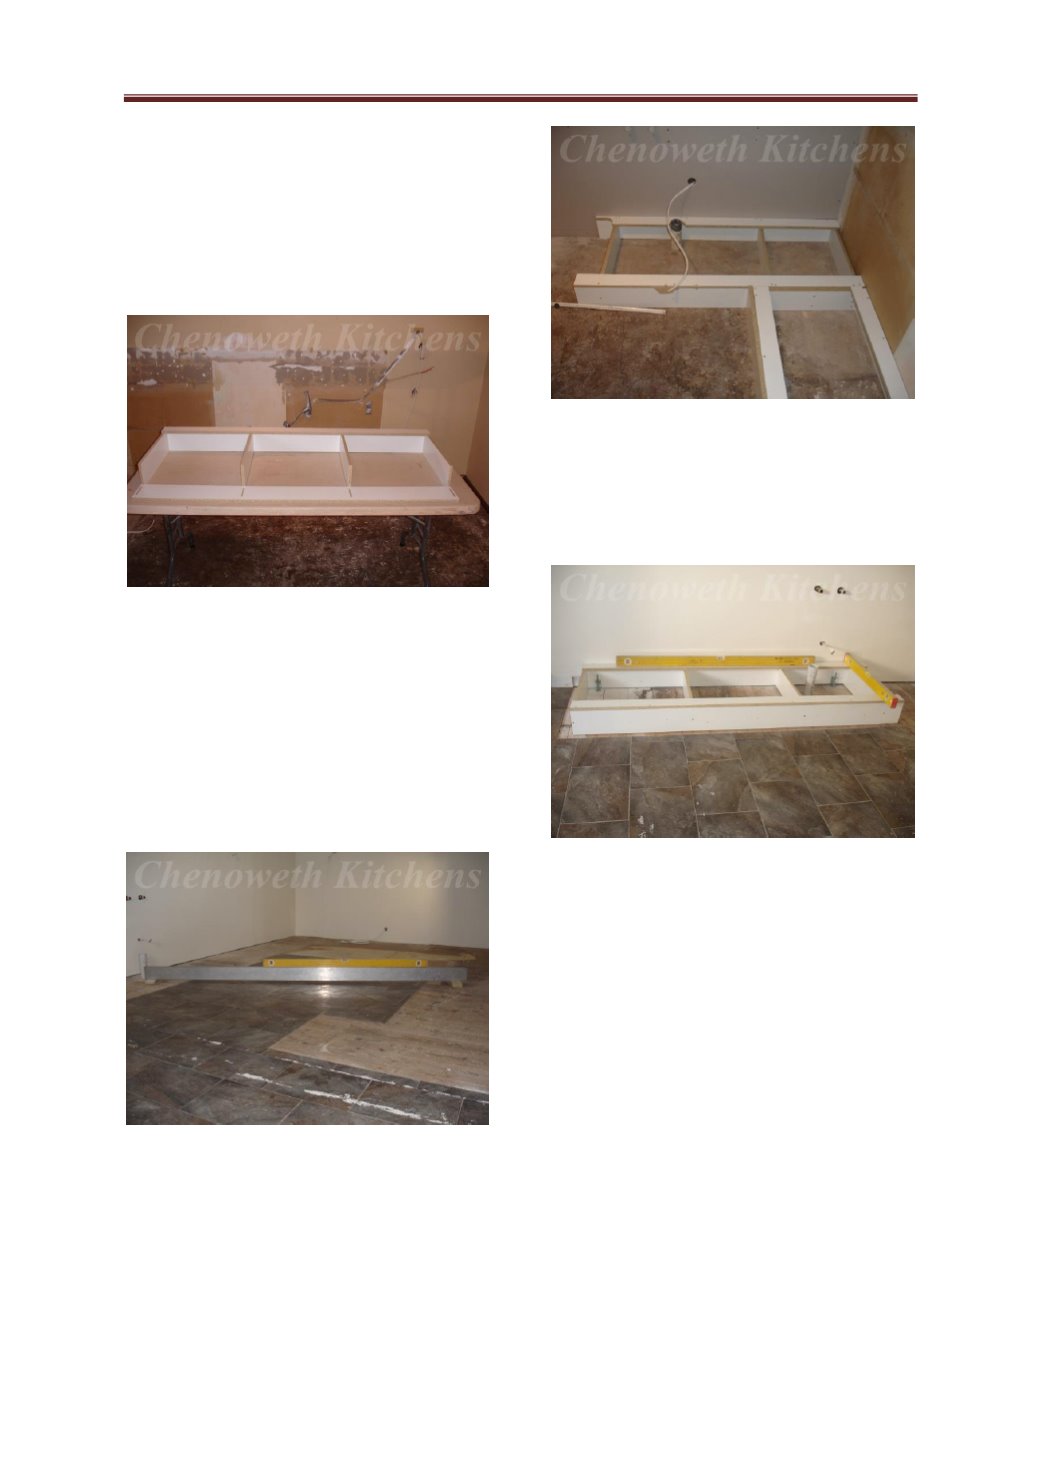
4. Kick box installation instructions.
Note;
This is the most important part of the
kitchen installation.
Take your time to get this right and the rest of
the installation will go ahead smoothly.
Tip, Kick boxes that are fitted to the floor and
use wedges to level up is the preferred
industry method.
1,Assembly of kick boxes.
Assemble the kick boxes, take care to screw
70mm rails to the top of the kick boxes using
the 45mm screws provided.
Tip, You can use the large delivery box as
work bench , you may wish to elevate it by
fixing four legs to it .
2,Finding the lowest point of the floor.
Find the lowest point of the floor level where
the kitchen is to be placed, this is your starting
position for the highest part of the kitchen;
Standard is 150mm to top of kick box at the
lowest point of the floor.
3, Positioning the kick boxes.
Place the kick boxes in position as numbered
taking care to place the side kick off sets into
the corners and either side of the dishwasher.
4,Levelling up kick boxes using the metal
jacks option.
If you are using the metal jacks option , then
glue & screw blocks to the back of the kick
boxes once levelled to height, the front facing
will support the front of the kick box. ;
Standard is 150mm to top of kick box at the
lowest point of the floor.